CheckPoint Images — Chapter 6

Refer to the checkpoint images below to check your results for the practice exercise.
Part One: Scenario #1

Part One: Scenario #2

Part Two: Image #1

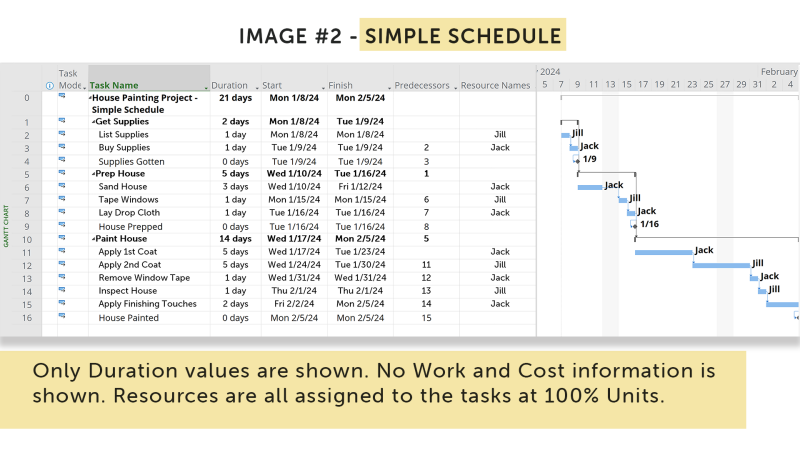
Part Two: Image #2